Table of Contents:
Paper Quality, Print Resolution, and Color Strategy for Thesis Submission
The physical quality of your printed thesis communicates professionalism before an examiner reads a single word. Most universities specify 80–100 gsm paper weight as the minimum standard, but experienced candidates consistently choose 90 gsm or 100 gsm for bound copies. The heavier stock resists ink bleed-through, holds binding adhesive more reliably, and simply feels substantial in the hand — a detail that registers subconsciously with committee members who handle dozens of submissions. Avoid standard 75 gsm office paper for anything beyond draft prints; the difference in tactile quality is immediately obvious.
Print Resolution: Where Most Candidates Cut Corners
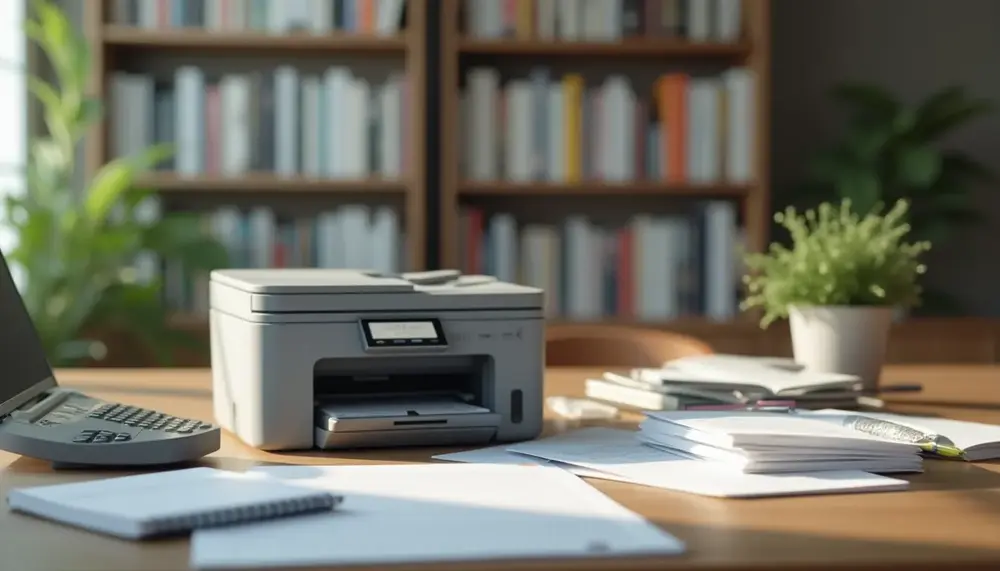
Print resolution is the single most overlooked variable in thesis production. For body text, 600 dpi (dots per inch) is the acceptable floor — at this setting, 10pt and 11pt fonts render cleanly without jagged serifs. However, if your thesis contains microscopy images, histological staining charts, or detailed technical diagrams, you need a minimum of 1200 dpi for line art and 300–600 dpi for photographic content. These thresholds are not arbitrary: they match the resolution standards used by academic journal publishers. Anyone serious about producing a polished final copy should proof-print at least one image-heavy chapter at full resolution before committing to the entire print run.
Laser printers consistently outperform inkjet for text-heavy documents — toner fuses directly onto the paper fiber rather than sitting on top, which means sharper letterforms and better longevity. For a 300-page thesis, laser output also dries immediately, eliminating smearing when pages stack in the output tray. If your university print service uses offset or digital press technology, ask specifically about their dpi output settings rather than assuming professional equipment means maximum quality.
Color Strategy: When to Print in Color and When to Resist
Color printing costs between 3 and 10 times more per page than monochrome, depending on the service and country. A strategic approach is to identify which figures genuinely require color to convey meaning — flow cytometry plots, geographical heat maps, statistical visualization with overlapping data series — versus those that work equally well in grayscale. Converting bar charts and simple line graphs to grayscale before submission reduces costs significantly without any loss of scientific clarity. The detailed mechanics of preparing each chapter's print settings correctly will save you from discovering a color mismatch on the final hard copy.
For color-critical figures, always request a calibrated color proof from your print provider before the full run. Monitor color profiles (typically sRGB) differ from print color spaces (CMYK), and the conversion can shift blues toward purple and reduce contrast in reds. Submit your figures as CMYK PDFs wherever the print service supports it. Candidates working with full-color data visualizations should review how professional academic print workflows handle color management to avoid costly reprints.
- Paper weight: 90–100 gsm for bound submission copies, 80 gsm acceptable for draft review only
- Text resolution: minimum 600 dpi; 1200 dpi for line art and technical schematics
- Image resolution: 300 dpi minimum for photographs, 600 dpi preferred for scientific imagery
- Color pages: limit to figures where color carries essential meaning; convert all others to grayscale
- File format: submit print-ready PDFs with embedded fonts and CMYK color profiles
Thesis Format Standards: Margins, Fonts, and Structural Compliance
Before a single page goes to print, your thesis must meet the formatting requirements set by your institution — and these are rarely negotiable. Most universities in the UK, US, and Germany operate with well-documented style guides that specify everything from binding margins to line spacing. Understanding what separates a compliant submission from one that gets returned for revisions can save you days of rework right before your deadline.
Margins: More Than Just White Space
Margins in a thesis serve a structural function, not an aesthetic one. The binding margin — typically the left margin for single-sided printing — must be wide enough to accommodate the spine without obscuring text. Standard requirements call for a left margin of 3.0–4.0 cm, while the right, top, and bottom margins usually range from 2.0–2.5 cm. If you're printing double-sided, institutions often require mirror margins, where the inner margin on each page alternates to maintain consistent clearance from the binding edge. Ignoring this detail means text physically disappears into the spine after binding — a frustrating and entirely avoidable outcome.
Page numbers are part of the margin equation as well. Many style guides require them placed within the footer or header at a minimum of 1.5 cm from the page edge. Some institutions specify exact placement — bottom center, top right — so verify this before formatting your master document.
Fonts, Spacing, and Readability Standards
Font choice affects both readability and print quality. The most widely accepted typefaces for academic theses are Times New Roman (12 pt), Arial (11 pt), and Garamond (12 pt). Serif fonts like Times New Roman remain the default for most humanities and social science programs, while engineering and technical faculties increasingly accept clean sans-serif alternatives. Regardless of typeface, line spacing of 1.5 or double spacing is standard for body text — single spacing is typically reserved for footnotes, captions, and block quotations.
Chapter headings, subheadings, and figure captions require their own consistent hierarchy. A three-level heading structure — using point size, weight, and sometimes capitalization to differentiate levels — keeps the document navigable and professional. Inconsistent heading styles are among the most common formatting errors flagged during submission review.
For anyone working across multiple print formats — whether submitting a digital version alongside a bound hard copy — the technical differences between print-optimized and screen-optimized layouts matter more than most candidates realize until they're looking at a washed-out PDF on screen versus a crisp printed page.
- Body text: 12 pt Times New Roman or 11 pt Arial, 1.5 or double line spacing
- Footnotes and captions: 10 pt, single spacing
- Left/binding margin: minimum 3.0 cm, often 3.5–4.0 cm for hardbound copies
- Paragraph spacing: 6–12 pt after each paragraph, no additional blank lines between paragraphs
- Justified text: required by most institutions; left-aligned is acceptable in technical disciplines
Structural compliance goes beyond visual formatting. Front matter — including the title page, abstract, declaration, and table of contents — follows a prescribed sequence that varies by institution but rarely by much. A thorough understanding of the full academic printing workflow helps you treat formatting not as a final step, but as an integral part of the writing process. Lock down your template early, and apply it consistently from chapter one.
Key Considerations for Successful Thesis Printing
| Aspect | Details | Pros | Cons |
|---|---|---|---|
| Paper Weight | 80–100 gsm recommended for professional quality | High-quality feel, resists ink bleed-through | Higher cost |
| Print Resolution | Minimum 600 dpi for text, 1200 dpi for line art | Clear text and images | Increased production costs |
| Color Printing | Use color strategically where necessary | Enhances clarity and presentation of essential figures | Costs can escalate significantly |
| Margins | 3.0–4.0 cm left margin, 2.0–2.5 cm for others | Ensures readability and prevents text obscured by binding | Strict guidelines can be limiting |
| Binding Type | Hardcover recommended for doctoral submissions | Durability and professional appearance | Higher expense and longer turnaround time |
Page Count Expectations by Discipline and How They Affect Print Scope
Page count is not a universal constant in academic writing — it varies dramatically by field, institution, and degree level, and these differences have direct, practical consequences for how you approach printing and binding. A computer science bachelor's thesis might clock in at 40–60 pages, while a humanities dissertation can run 300 pages or more. Understanding where your work sits in this spectrum is the first step toward making smart decisions about paper weight, binding method, and production budget.
Discipline-Specific Ranges You Can Actually Plan Around
Across most European and North American universities, bachelor's theses in STEM disciplines typically fall between 40 and 80 pages, with heavy reliance on figures, code appendices, and data tables. Social sciences and economics usually land in the 60–100 page range. Humanities theses tend to be the most expansive at the bachelor's level — often 80 to 120 pages — because argumentative depth and source integration demand more prose. If you're unclear about where your own work should land, it's worth reading up on what realistic page lengths actually look like across different fields, because misjudging this early leads to avoidable reprints and cost overruns.
Master's theses follow a similar pattern but with roughly 40–60% more content on average. A master's thesis in law or political science hitting 150–200 pages is entirely normal. Doctoral dissertations are a category of their own: humanities PhDs regularly exceed 80,000 words, translating to 250–400 printed pages, while science PhDs may stay under 150 pages due to the density of technical content rather than extended argumentation.
How Page Count Shapes Binding and Print Decisions
The spine width of a bound thesis is directly tied to page count and paper weight. A 60-page thesis printed on 80g/m² paper produces a spine of roughly 6–7mm — too thin for most hardcover binding methods to look professional. At this thickness, softcover or saddle-stitch binding is often a better aesthetic and structural choice. Once you cross 120 pages on standard paper, spine-lettered hardcover binding becomes both viable and visually appropriate. Print shops typically require a minimum of 100–120 pages before they'll recommend hardcover binding with foil lettering.
Heavy appendix sections — raw data, survey instruments, full code listings — present a specific decision point. Including them in the bound copy inflates page count and cost significantly. Many disciplines accept, or even expect, that appendices are submitted digitally rather than printed. Check your institution's submission guidelines before assuming everything needs to be in the physical copy. The formatting standards your institution mandates will often specify what must be printed and what can be submitted as supplementary digital material.
Paper choice also scales with page count in a non-obvious way: thicker paper (90–100g/m²) increases spine width, which benefits thinner documents but can make very long theses feel unnecessarily bulky. For anything over 200 pages, staying with 80g/m² paper keeps the volume manageable without compromising readability. When planning your print run, factor in that different page count thresholds unlock different format options across the print-on-demand and copy shop landscape — not every provider handles all binding types at all page counts.
- Under 80 pages: Softcover, thermal binding, or ring binding; hardcover rarely justified
- 80–150 pages: Transition zone — softcover or hardcover both viable depending on institutional requirements
- 150+ pages: Hardcover binding standard; spine lettering becomes practical and expected
- 250+ pages: Consider 80g/m² paper to avoid excessive bulk; split volumes rarely accepted at bachelor's/master's level
Building a Print-Ready Thesis: From Outline to Final Document Structure
Most thesis printing disasters trace back to the same root cause: structural decisions made too late in the process. By the time students send their document to the print shop, they've already locked themselves into margin inconsistencies, orphaned headings, and chapter breaks that fall awkwardly mid-page. Getting your structure right before you write a single body paragraph isn't perfectionism — it's the only practical workflow that produces a clean final document.
Locking Down Your Architecture Before You Write
Start with a detailed outline that mirrors your final printed document, not just your argument. That means defining chapter numbering, heading levels, appendix placement, and page break logic from the beginning. A well-structured research paper template designed for print will already account for these physical constraints — including how front matter pagination (Roman numerals i–xii) transitions to Arabic numerals at Chapter 1. This switch sounds minor but causes formatting failures in roughly 40% of first-time thesis submissions that require corrections.
Your heading hierarchy directly controls how your printed document navigates. Most university style guides require three to four distinct heading levels. In Microsoft Word, never format headings manually — always assign Heading 1 through Heading 4 styles, then modify those styles globally. A single font-size change to Heading 2 propagates across 200 pages in seconds; doing it manually across 60 individual headings guarantees inconsistencies that examiners and print technicians will flag immediately.
Evidence Structure and Its Impact on Page Flow
The internal logic of your chapters determines more than academic quality — it shapes physical page density. Chapters built around strong evidence frameworks tend to produce more balanced page distributions than those assembled reactively. When you organize your argument using a consistent evidence-to-analysis ratio, you naturally avoid the common problem of a 6-page chapter followed by a 47-page chapter. For printing, extreme length disparities create binding and cost issues, particularly with perfect-bound theses where spine width is calculated on total page count.
Structural clarity also prevents widows and orphans — the typographic term for single lines stranded at the top or bottom of a page. Enable widow/orphan control in your word processor's paragraph settings and set it to a minimum of 2 lines. Combine this with Keep with Next applied to all heading styles so no heading ever prints as the last line on a page.
When working through complex argumentative sections, examining concrete examples of how evidence and claims interlock structurally helps you identify where your own sections might balloon unpredictably or collapse into underdeveloped pages. Aim for 2,500–4,000 words per major chapter in a standard humanities or social science thesis — this range produces consistent page counts that your print layout can accommodate without last-minute restructuring.
- Front matter checklist: Title page, declaration, abstract (max 300 words for most institutions), acknowledgments, table of contents, list of figures/tables
- Section breaks vs. page breaks: Always use section breaks before chapters to enable independent header/footer control per section
- Figure placement: Anchor figures to paragraphs, not to fixed page positions — fixed anchors cause cascading layout failures when text is edited
- Final pagination audit: Verify that chapter starts fall on odd (recto) pages if your university requires duplex printing with chapter-right formatting
Export a PDF proof from your word processor at least three times during drafting — at outline stage, at 50% completion, and at final draft. Each export reveals layer problems invisible in the editing view, including font substitutions, broken cross-references, and table overflows that will print incorrectly if caught only at submission.
Binding Methods, Finishing Options, and Their Academic Implications
The binding you choose for your thesis is not a purely aesthetic decision — it directly affects whether your work gets accepted by your institution, how examiners perceive its quality, and how well it survives decades in a library archive. Most universities specify binding requirements explicitly in their submission guidelines, yet a surprising number of students discover these rules only after their print run is complete. Reviewing institutional requirements before you even open a print dialog should be non-negotiable.
Hardcover vs. Softcover Binding: What the Differences Actually Mean
Hardcover case binding — where the text block is sewn or glued and then attached to rigid boards covered in cloth or synthetic material — remains the gold standard for doctoral dissertations at most European and North American research universities. A properly casebound thesis can withstand 50+ years of archival handling without spine degradation, which is precisely why many PhD programs mandate it for the library copy. Expect to pay between €25 and €60 per copy for professional hardcover binding, with turnaround times typically ranging from 2 to 5 business days at specialist printers.
Softcover perfect binding is widely accepted for master's theses and is the dominant format for personal copies. Here, the pages are glued directly into a thick cover wrap. The critical variable is adhesive quality: cheaply bound copies can crack open after 20 to 30 page-turn cycles, particularly with heavier 100 g/m² paper. Always request PUR adhesive binding rather than standard EVA hotmelt — PUR creates a flexible, durable spine that holds even with heavyweight stock and is worth the marginal additional cost of €2–5 per copy.
Finishing Details That Signal Professionalism
Beyond the binding method itself, several finishing choices accumulate to define the physical impression your thesis makes. When you're working through the step-by-step decisions in your print workflow, finishing options deserve the same attention you'd give to margin settings. Three areas warrant particular focus:
- Spine printing: For hardcover copies, insist on printed or foil-stamped spine text (author name, title, year). Libraries catalog by spine, and an unlabeled thesis spine creates practical filing problems.
- Cover lamination: Matte lamination on softcover theses reduces fingerprinting and UV yellowing. Gloss lamination looks vibrant on screen mockups but shows wear quickly in handling.
- End papers and headbands: On hardcover editions, white or cream end papers and colored headbands at the spine extremities are finishing details that signal deliberate craftsmanship — a subtle but real signal to examiners.
- Edge cutting precision: A clean, flush three-side trim (typically leaving a 210×297 mm final page for A4) prevents the ragged edges that often result from home printing and ring-binder assembly.
Institutions increasingly accept digital submission alongside print copies, but the physical copy still carries ceremonial and archival weight. As you navigate the broader landscape of academic printing and publishing requirements, keep in mind that some universities require the library copy to carry an official embossed seal or sticker — confirm this at least three weeks before your submission deadline to avoid last-minute reprints.
Ring binding and comb binding, while convenient for draft review, are almost universally prohibited for final thesis submissions. If you're uncertain which formats your department accepts, the comprehensive overview of professional thesis printing formats clarifies the distinctions that matter when communicating with print shops. Ordering at least one proof copy 10 days before your submission date gives you real time to identify binding or trim issues before committing to a full print run.
Narrative and Expository Text Structures and Their Impact on Print Layout
The way you organize your thesis content at a structural level directly shapes how the printed document reads, breathes, and holds together as a physical object. A chapter built on narrative text structure — where you guide the reader through an argument chronologically or via cause-and-effect chains — demands different typographic treatment than a section driven by expository logic, which prioritizes classification, comparison, or definition. Understanding this distinction before you finalize your print settings saves you from costly last-minute reformatting.
Narrative passages typically run in dense, flowing paragraphs where rhythm and continuity matter. When printing these sections, a line spacing of 1.5 or double is not just a formatting guideline — it actively aids readability by giving the eye room to track argument progression. If you're refining how your own chapters balance storytelling with analysis, the practical techniques for building a compelling argumentative arc in academic writing are worth reviewing before you lock in your final document structure.
How Expository Sections Shape Column Width and Margins
Expository text, particularly in methodology and literature review chapters, frequently incorporates definitions, enumerations, and parallel structures. These elements push toward wider margins — typically 2.5 cm on all sides for standard A4 printing — to prevent the text block from feeling claustrophobic when nested lists or indented definitions appear. A line length of 65–75 characters is the professional standard for expository academic prose; exceeding this strains comprehension without adding information density.
When your thesis shifts into exposition-heavy territory — think conceptual frameworks or theoretical grounding — consider how block quotations and definitions will render in print. A 1.25 cm additional indent for block quotes, combined with a slightly reduced font size (10pt vs. 12pt body text), creates a visual hierarchy that signals the reader has moved from your voice to source material. For a detailed breakdown of how the structural components of academic exposition function at the sentence and paragraph level, it's worth revisiting your drafts with those principles in mind before sending to print.
Evidence Passages and Their Specific Layout Demands
Evidence-centered sections — where you present data, cite studies, and build empirical arguments — create unique layout challenges. Tables, figures, and statistical citations fragment the reading flow in ways that pure narrative or expository text does not. Each figure needs a minimum 6pt spacing above and below, and figure captions should align to the left margin at 10pt, keeping them visually subordinate to the data they describe.
The structural logic behind how you present evidence also determines whether your argument lands clearly on paper. Mastering how evidence-based text architecture reinforces your central claims is foundational — especially in sciences and social sciences where a poorly sequenced results section can make even solid data appear inconclusive. Print amplifies these weaknesses because the reader cannot easily scroll back; the argument must be self-evident on each physical page.
- Narrative chapters: Use 1.5 line spacing, minimal subheadings, wider text blocks
- Expository chapters: Apply consistent indentation for definitions, 65–75 character line length
- Evidence sections: Standardize figure/table spacing, left-align captions at reduced font size
- Mixed-structure chapters: Use horizontal rules or increased white space to signal structural transitions
Print decisions made without awareness of text-type differences typically result in documents where some chapters feel cramped while others look sparse — a signal to examiners that formatting was applied uniformly rather than thoughtfully. Map your chapter types before you set your document defaults.
Print Culture, Academic Publishing, and the Shift Toward Digital-Physical Hybrid Submission
The relationship between academic institutions and physical print runs far deeper than mere bureaucratic tradition. The cultural weight that print carries in scholarly contexts reflects centuries of knowledge preservation logic — the idea that a bound, archivable object signals intellectual permanence in ways a PDF link simply cannot replicate. This isn't nostalgia. Major research libraries, including the British Library and the Library of Congress, continue to mandate physical deposit copies for doctoral dissertations, precisely because digital-only records carry format obsolescence risks that span decades.
What has genuinely changed is the workflow surrounding that physical object. Most European universities shifted between 2015 and 2020 toward hybrid submission models, requiring both an institutional repository upload and a minimum of two to five bound copies. The University of Oxford, for example, moved to a model where digital submission via the Oxford Research Archive is mandatory, but bound copies remain required for certain faculties and for the examination process itself. Understanding where your institution sits on this spectrum determines everything from your print run quantity to your timeline.
What "Hybrid Submission" Actually Means in Practice
A hybrid submission model is not simply "print plus digital." It involves coordinated formatting decisions that satisfy both display environments simultaneously. A thesis formatted purely for screen reading — with hyperlinked footnotes, embedded video, or RGB color figures — will often fail print quality standards unless specifically adapted. Researchers navigating the full publication pipeline quickly discover that margin requirements, bleed settings, and image resolution standards diverge significantly between digital repositories (typically 150 dpi for screen) and offset or digital print production (300–600 dpi minimum).
The practical implications are concrete:
- Color figures must be exported in CMYK for print, while most digital platforms display in RGB — maintaining two source files is standard professional practice
- Font embedding must be verified for PDF/A compliance (the archival PDF standard), which several institutional repositories now enforce automatically at upload
- Margin widths for binding (typically 3–4 cm on the spine side) must not obscure content when the document is also read on-screen in single-page view
- Hyperlinks within the document should include full printed URLs in parentheses for the physical version — active links are non-functional once the document is bound
Academic Publishing Standards and Their Influence on Thesis Print Decisions
As more doctoral candidates aim to convert thesis chapters into journal articles or monographs, alignment with publisher formatting expectations becomes strategically relevant during the original print preparation phase. Springer, Elsevier, and Cambridge University Press each publish detailed author guidelines specifying figure resolution, reference style, and typographic conventions — getting these right from the outset reduces rework significantly. The technical production steps involved in preparing academic work for print overlap considerably between thesis submission and journal article preparation, making early investment in production quality a compound advantage.
Print-on-demand services now used by many academic print shops — including university-affiliated providers — operate on digital inkjet or laser technology rather than offset, which changes how you should specify color accuracy and paper weight. A 90 g/m² uncoated paper stock remains the professional standard for thesis body pages in most European and North American institutions, balancing legibility, archival stability, and binding durability over the 50-to-100-year retention periods that library systems plan for.
FAQ on Thesis Printing Essentials
What paper weight should I use for my thesis?
For professional quality, it is recommended to use paper weighing between 90 and 100 gsm for bound copies, while 80 gsm is acceptable for draft prints.
What is the minimum print resolution required for a thesis?
The minimum acceptable print resolution for text is 600 dpi. For line art and technical diagrams, 1200 dpi is preferred, while photographs should be at least 300 dpi.
How should I approach color printing in my thesis?
Color printing should be limited to figures where color conveys essential meaning. Others can be converted to grayscale to reduce costs significantly.
What are the margin requirements for a thesis?
The left margin should be between 3.0 to 4.0 cm for binding, while top, right, and bottom margins typically range from 2.0 to 2.5 cm. Double-sided printing requires mirror margins.
What binding type is recommended for thesis submissions?
Hardcover binding is recommended for doctoral submissions due to its durability and professional appearance, while softcover is acceptable for master's theses.